
Let’s dive into Our favourite jelly slice recipe, a scrumptious treat that has captured the hearts of families everywhere, especially single parents looking for quick and delightful dessert solutions. This jelly slice is not just a pleasure for the taste buds but also a feast for the eyes. With its vibrantly layered appearance, it’s sure to become a staple in your dessert repertoire.

Understanding the Magic of Jelly Slices
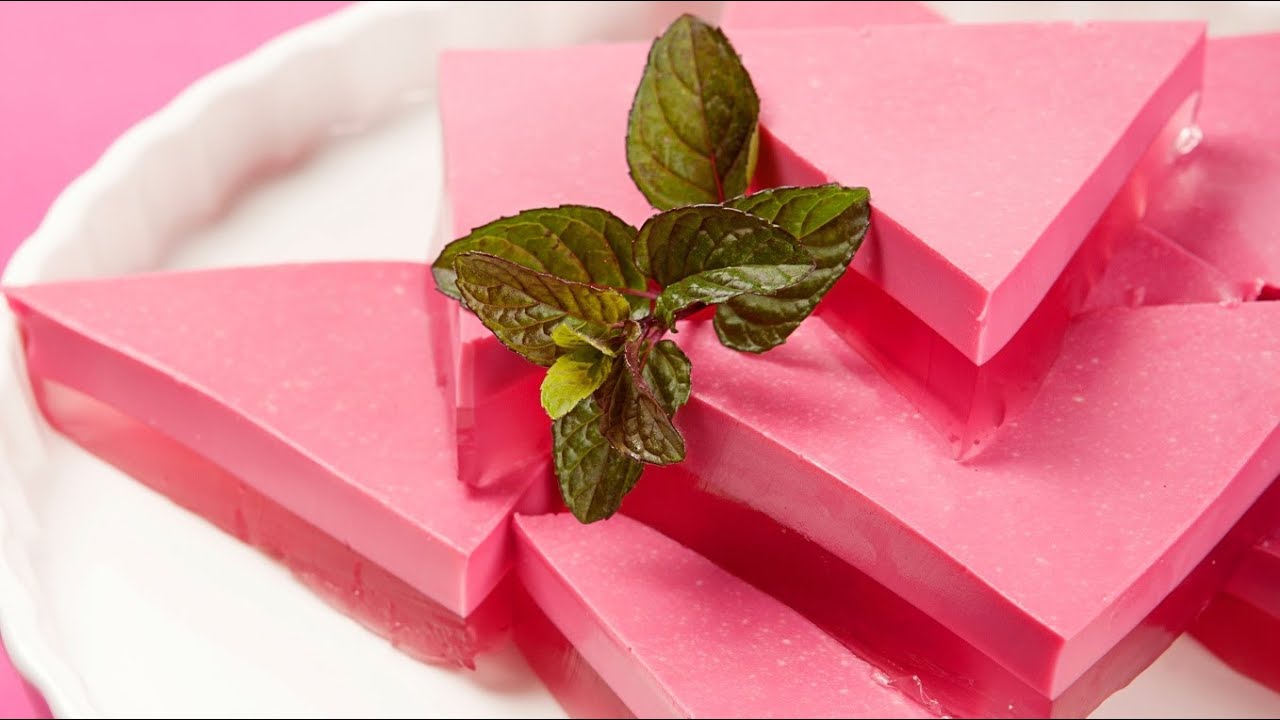
Jelly slices are a delightful treat that combines a biscuit base, creamy filling, and a jelly topping. The combination of textures and flavors makes it irresistible. When you bite into a perfectly chilled jelly slice, you encounter a crunchy base, a smooth and creamy middle layer, and a refreshing jelly top that all melt together beautifully in your mouth. The layers not only provide a delightful taste experience but are also visually appealing, making this dessert a real showstopper.
Ingredients:
- 1 cup of plain biscuits
- 125g butter, melted
- 395g can sweetened condensed milk
- 2/3 cup of lemon juice
- 3 teaspoons of gelatine powder
- 3 cups of boiling water
- 85g packet jelly crystals (flavour of your choice)
Step-by-Step Preparation
Creating Our favourite jelly slice is simpler than you might think, thanks to using common kitchen tools like a robust ‘stainless steel cleaner’ and ‘cutting board conditioner’. Heres how you can make it:
1. Prepare the Biscuit Base
Begin with your trusty knives set and cutting board. Crush the biscuits finely until they resemble breadcrumbs using a food processor. If you dont have one, you can place them in a zip-lock bag and crush them with a rolling pin. The goal is to ensure the biscuit pieces are uniform to create a solid base for the jelly slices. Melt the butter on a double boiler and mix it thoroughly with the biscuit crumbs in a large mixing bowl, ensuring all the crumbs are coated. Press this mixture firmly into the base of a lined slice pan, using the back of a spoon to level it out, creating an even surface. Once done, place it in the refrigerator to set while you prepare the other layers.
2. The Creamy Mid-Layer
For the creamy layer, take the sweetened condensed milk and lemon juice out. In another clean mixing bowl, stir the lemon juice into the condensed milk. Separately, dissolve two teaspoons of gelatine in 1/4 cup of boiling water; stir continuously to avoid lumps. Mix this slowly into the lemon and condensed milk mixture, whisking until its smooth and creamy. Pour this creamy mixture over the chilled biscuit base, smoothing it out with a spatula. The creaminess of this layer provides a perfect contrast to the crunchy base and the refreshing topmost jelly layer.
3. Adding the Jelly Top
The jelly layer is the pice de rsistance of Our favourite jelly slice recipe. Prepare it by dissolving the jelly crystals in 2 3/4 cups of boiling water. Stir until all crystals are completely dissolved; youll be rewarded with a brilliant, clear jelly. Allow it to cool slightly at room temperature. Once the creamy layer has set in the fridge (usually around 1 hour), gently pour the jelly mixture over it. Ensure you pour slowly and evenly so as not to disturb the creamy layer underneath. This charming jelly layer will tantalize the appetite with its shimmering surface.
Troubleshooting Common Issues
Some common issues include the layers not setting properly or mixing. This usually occurs if each layer hasnt had sufficient time to set before adding the next. Patience is crucial, so ensure each step is given adequate resting time in the fridge to avoid any culinary mishaps. If youre ever stuck, taking a moment to reread the instructions and staying organized helps alleviate these snafus quickly.
To Serve and Enjoy
Once your jelly slice has thoroughly set, use a sharp knife to cut it into even squares or rectangles to suit your preference. Each slice should showcase all three layers beautifully, inviting all who see it to indulge their senses. It’s lovely to pair with a cup of tea for a mid-afternoon treat or serve with a dollop of whipped cream for dessert. Remember to frequently clean your knives with stainless steel cleaner to maintain a perfect cut every time.
Why Single Parents Love This Recipe
For single parents navigating busy lives, Our favourite jelly slice recipe offers simplicity and joy. Its straightforward preparation with few ingredients makes it manageable and even enjoyable without occupying all your free time. The vibrant layers make it a fun family project, and with its ease of division into individual portions, its perfect for school lunches or quick desserts after dinner. In addition, the soothing ritual of creating a jelly slice can be a great way to bond and create fond family memories.
For more delightful dessert inspirations and a plethora of creative cooking ideas, check out Jane’s Patisserie’s ‘Dessert Collection’.

Keep Exploring Cooking Tips!
If you’re interested in trying out other delightful recipes or exploring travel tales, you might want to check out ‘Slimming World Week 20’ for more fantastic content. Were certain youll find something that tickles your fancy.


